OpenStack 单机部署 —— PackStack
前言
先前总结了 OpenStack 部署方式,然后就开始上手进行实验,使用 Packstack 可以说是其中最简单的安装方式了,虽然也折腾了很久,但遇到的错误是相对最少的。
由于在 VirtualBox 上安装 CentOS 8 失败,于是就用 CentOS 7 作为实验环境,测试安装了两个版本的 OpenStack(Train/Stein)都没有问题,以下总结了使用 Packstack 部署 OpenStack 的流程。
环境准备
使用 VirtualBox 安装 CentOS 7 Minimal ,配置如下:
- CPU:4 Cores
- 内存:8 GB
- 硬盘:80 GB
- 网卡:NAT
配置端口转发
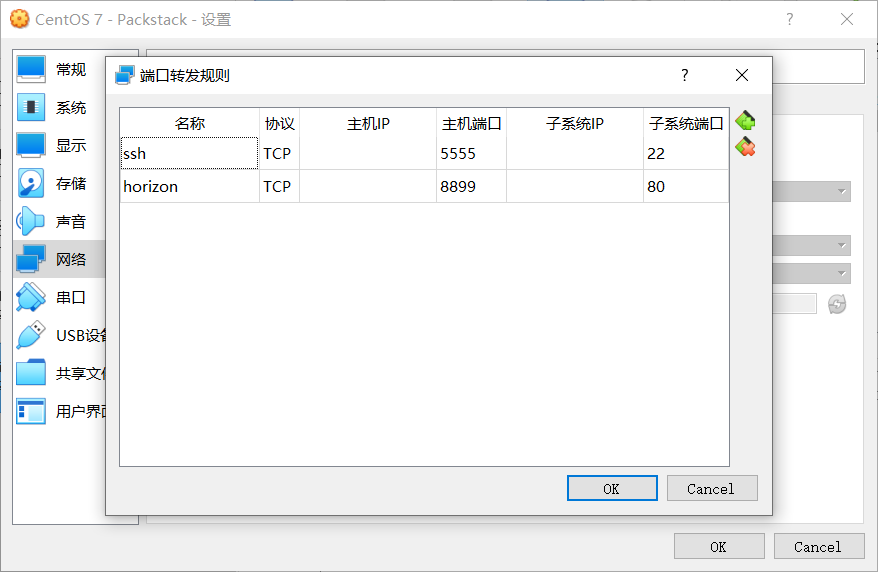
ssh
修改配置文件,允许 root 用户使用密码远程登录
1 | # 修改配置文件 |
安装 pip 并更换 pip 源
CentOS 7 自带 Python 2.7.5 ,但 pip 需要额外安装
1 | # 添加 epel 仓库 |
pip 21.0 不支持 Python 2.7 ,所以得安装一个版本低一点的,否则无法使用
1 | # 升级 pip |
更换 yum 源
配置阿里云 yum 源加速
1 | # 备份原始文件 |
防火墙与网络配置
关闭 firewalld、NetworkManager、SELinux,启用 network
- 禁止开机自启
1 | sudo systemctl disable firewalld |
Packstack 安装
添加相应的 OpenStack 仓库
1 | # 添加仓库 |
安装 Packstack
1 | # 安装 Packstack |
单机部署
1 | # 安装 OpenStack |
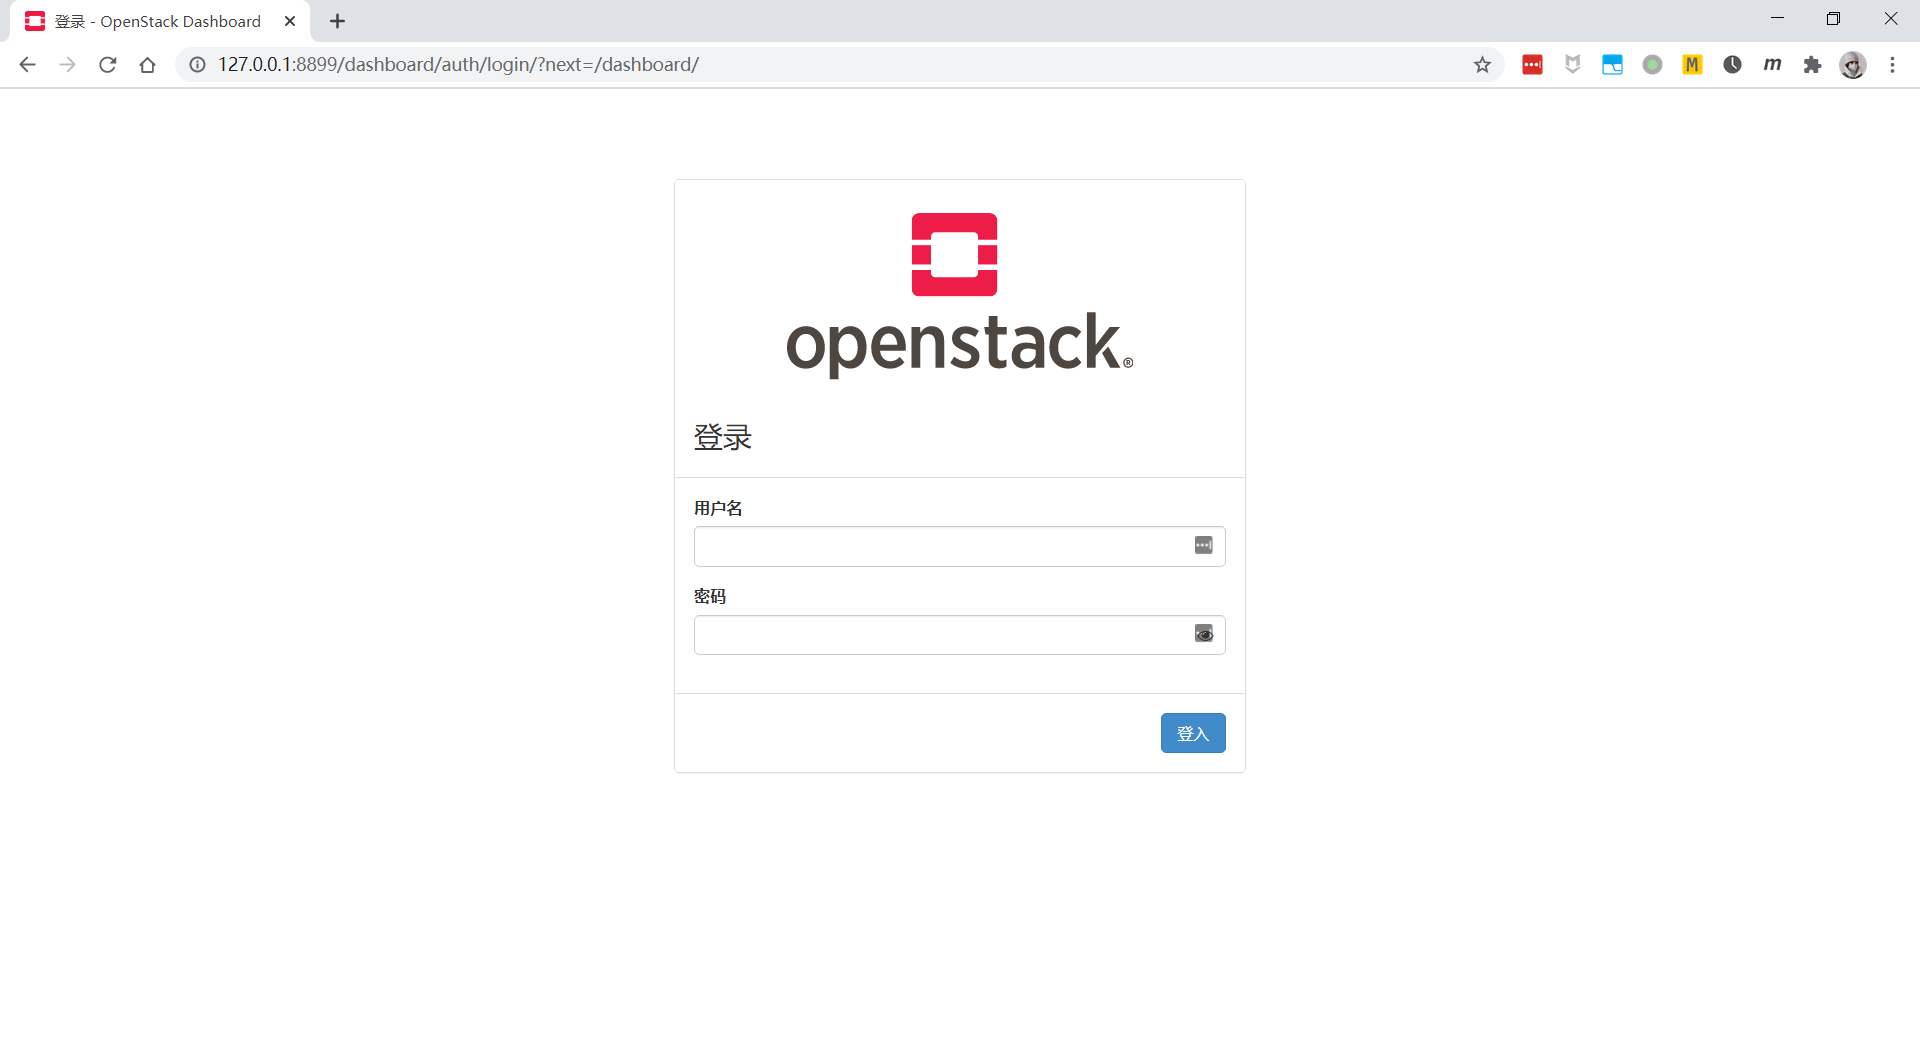
访问服务
安装完毕后,使用浏览器访问 horizon
命令行查看已安装服务(asciinema)
问题解决
error while loading shared libraries: leatherman_curl.so.1.3.0
安装 OpenStack 的过程中报错,原因是使用的 leatherman 版本不兼容,降级后再次执行安装即可
1 | # 降级 leatherman |
主机上无法访问 Horizon
直接在浏览器输入 http://127.0.0.1:8899/dashboard 返回 302 错误,原因是访问该路径时会进行一次重定向,而 127.0.0.1 不是服务器的有效别名,修改配置添加别名即可。
PS:因为这个我还重装了好几次,没想到后来添加一个别名就好了xddd
1 | # 编辑配置文件 |
参阅
- Python Pip broken wiith sys.stderr.write(f“ERROR: {exc}”)
- pypi 镜像使用帮助
- CentOS 7- 配置阿里镜像源
- Packstack —— RDO
- OpenStack Deployment on CentOS 7 With Packstack
- Packstack安装OpenStack问题:facter: error while loading shared libraries: leatherman_curl.so.1.3.0
- Red Hat RDO: Horizon ‘/dashboard’ will not load from Internet
本博客所有文章除特别声明外,均采用 CC BY-NC-SA 4.0 许可协议。转载请注明来源 Jckling's Blog!
相关推荐

2021-05-10
使用 Docker 部署 Jaeger + Elasticsearch + Kibana
使用 Elasticsearch 作为持久化存储,部署 all-in-one 镜像/单独部署 Jaeger 组件;elasticdump 导出数据,Kibana 可视化追踪信息。
2021-11-05
CVE-2020-12691 漏洞利用相关信息追踪
使用 Jaeger 对 Keystone 进行追踪
2021-04-02
全链路追踪与 Jaeger 入门
全链路追踪及 OpenTracing 概念介绍,Jaeger Python 入门实验
2020-12-25
CentOS 7 安装 Openstack Rocky 版本 - 环境搭建
根据官方手册使用 CentOS 7 集群搭建 Openstack 基础环境。
2020-12-26
CentOS 7 安装 Openstack Rocky 版本 - 身份认证服务(Keystone)
在 Openstack 基础环境之上搭建身份认证服务。
2020-12-26
CentOS 7 安装 Openstack Rocky 版本 - 镜像服务(Glance)
在 Openstack 基础环境之上搭建镜像服务。
2020-12-26
CentOS 7 安装 Openstack Rocky 版本 - 计算服务(Nova + Placement)
在 Openstack 基础环境之上搭建计算服务。
2020-12-27
CentOS 7 安装 Openstack Rocky 版本 - 网络服务(Neutron)
在 Openstack 基础环境之上搭建网络服务。
2020-12-28
CentOS 7 安装 Openstack Rocky 版本 - 对象存储服务(Swift)
在 Openstack 基础环境之上搭建对象存储服务。
评论